How to Take Better Pictures

sidewalk bricks

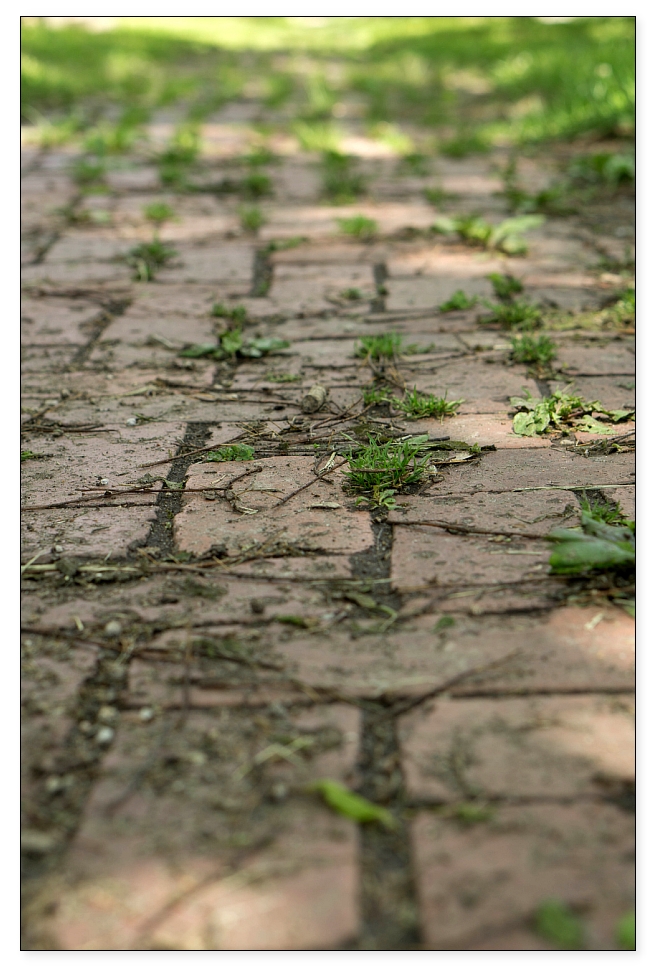
I just love a brick sidewalk!

Hi, just the other day I had a co-worker ask me how I took such good pictures. What a wonderful compliment and it made me feel great. I believe there are two simple things one can do to take better pictures with any camera. Sure, those fancy big cameras have some mighty nice bells and whistles. If one knows what all of them do and how to use them, the pictures look awesome. The key is knowing what they do and how to use them. In this post I will not get into the technical side of photography; instead it will be the non-technical (position of camera) I will talk about. This will work with any of your camera’s mode settings (auto or A-S-P-M).

First, read the manual to learn what each control, switch, button, and menu item does. Learn the basic actions, such as using the flash (on, off, and auto), zooming in and out, and using the shutter button. I would even recommend keeping a copy of the manual in your camera bag.

Secondly, how do you take your pictures, standing up? When I took this image, I was standing straight up camera at eye level. The camera was positioned horizontally.

sidewalk
LENS: 50mm F1.8
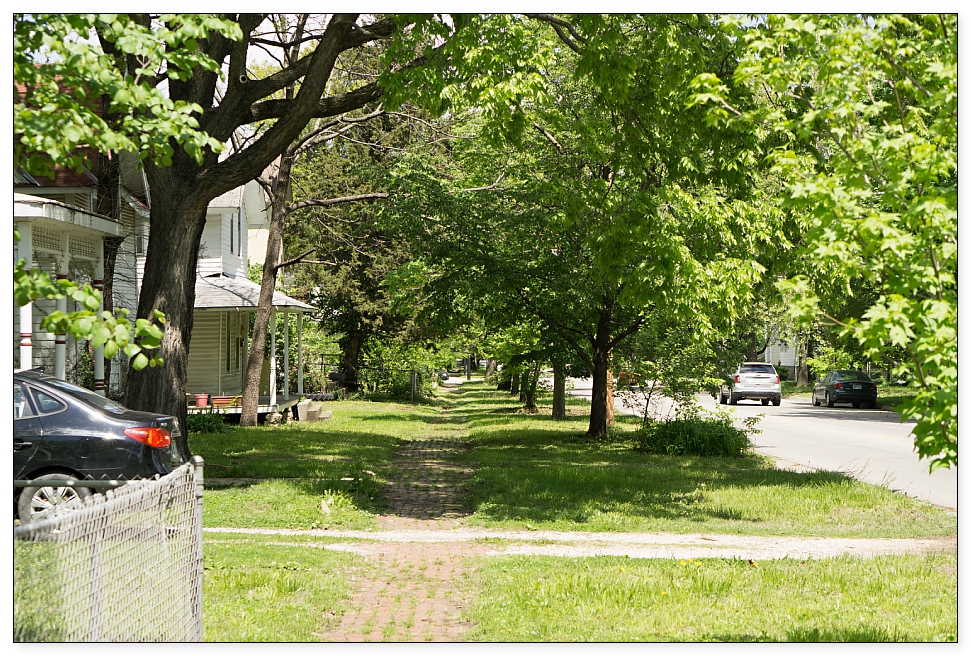
EXP: 1/400 sec; f/4.5; ISO 100

Try turning the camera vertically. Don’t confuse this with cocking the camera. Even though this can be done, doing it too much can distract from the image.

sidewalk
LENS: 50 mm F1.8
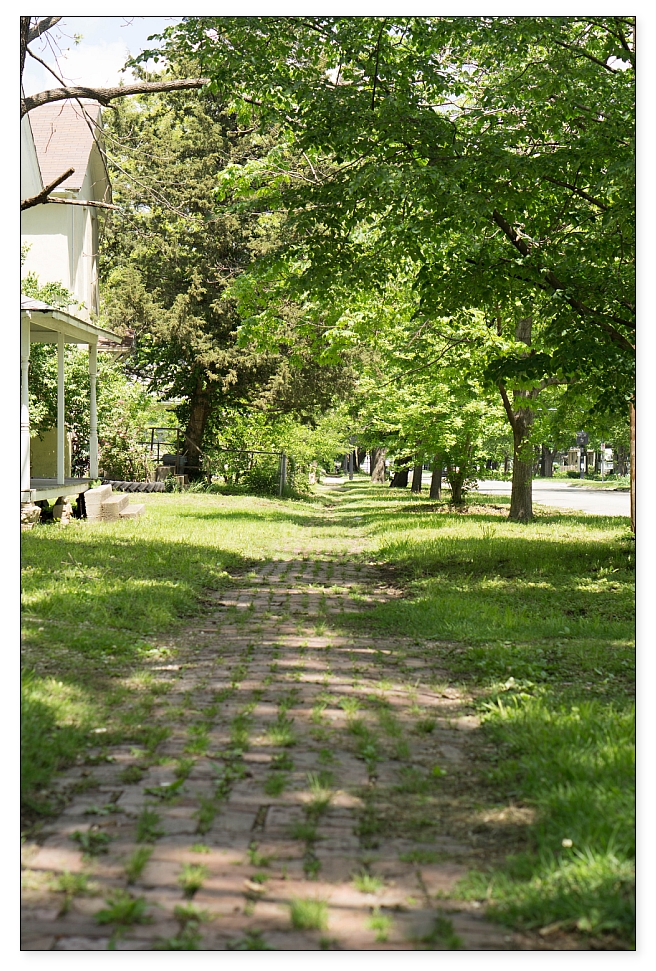
EXP: 1/250 sec; f/4.5; ISO 100

Can you see any difference in the pictures? For the next image, I bent down to the ground (squatting- still on my feet).

sidewalk bricks
LENS: 50 mm F1.8
EXP: 1/160 sec; f/4.5; ISO 100

This last picture I set the camera on the sidewalk bricks holding the lens up just enough to keep it off the ground.

ground sidewalk
LENS: 50 mm F1.8
EXP: 1/200 sec; f/4.5; ISO 100

See how amazing it is to get four different images that were taken in the same place! The only difference was the level of the camera.

The next time you take a picture, take it a second time but place the camera at a different level. You’ll be amazed!

Best Wishes,
debra

For more basic suggestions on how to take better pictures, check out this link.

Freeze | How to Take Sharp Action Pictures

SHARP ACTION PICTURES

action pictures

Hi, taking pictures is what I do. Sometimes I just need to play; to remember why I love photography so much. Have you ever wondered how to take sharp action pictures? Here are the simple sure steps to freeze a picture while shooting in manual mode.

FOCUS MODE: AF-C
Select AF-C that continuously maintains focus on a moving subject while the shutter button is held halfway down.

FOCUS AREA: WIDE
Select Wide that automatically focuses on a subject, wherever it is positioned within the frame.

DRIVE MODE: Continuous Shooting- Hi
When shooting a moving subject, select Continuous Shooting that takes continuous shots while the shutter button is held all the way down.

SHUTTER SPEED: 1/500 sec. or faster
Try to select a fast shutter speed, so that the subject doesn’t become blurred.

The family image above settings info:
Focal Length: 70.00 mm (in 35mm: 105 mm)
Exposure: 1/640 sec; f/3.5; ISO 200; Manual

If you are just beginning to shoot out of the Auto mode, set your camera to the Shutter Priority mode (S or TV on camera top dial). Next set your Shutter Speed to 1/1000 or simply 1000. Then continue with the Focus Mode, Focus Area and Drive Mode. Note: With a shutter speed of 1/1000, this is very fast. You will want to be in a very bright area; outdoor action photos. An excellent reference is the camera manual. I keep mine in my camera bag. A pdf copy is on my smart phone as well! In case you have miss placed your manual, simply Google your camera make, model along with the word manual. This is how I saved a pdf copy to my smart phone.

Exciting events: While writing this post, Kevin asked if I would stop for a bit and walk down to the pond with him. Sure– how fun. I grabbed the camera. Good thing I did. Merle went with us and when Kevin cast his line out, Merle would go into the water after it!

kev-merle-fishing-action-pictures

dog water action pictures

Images on this website, I use the Sony Nex-5n and Sony a6000 exclusively. If your camera settings do not match the ones given above, please refer to your camera’s operating manual.

This was a time I wished I grabbed the zoom lens. Post edited the zoom in Photoshop for the images above.

Lens: E PZ 16-50mm F3.5-5.6 OSS
Focal Length: 50.00 mm (in 35mm: 75 mm)
Exposure: 1/1000 sec; f/5.6; ISO 200; Shutter priority

Have I inspired you to get out and freeze some photos?

Best Wishes,
debra

New Computer Not Reading SD Card

Hi, as you have read- my computer crashed last month. I must repeat this one important message- remember to take the time to back every single file up to a secure location! Okay now that we have that established…….

Working on this week’s post, I went to download pictures from Thanksgiving and my youngest grand-daughters first birthday party. Since the crash, most of my software programs have been re-installed on the new computer. Previously I downloaded images from my Nikon camera SD card just fine. Well this evening I opened Lightroom ready to import the Sony images. Nothing. I went to the file manager to locate the SD card- not there. This took forever to figure out why my computer was not reading my Sony camera SD card when it could read the Nikon camera SD card.

My computer is hp Pavillion Desktop Windows 10 and the camera with issues- Sony NEX-5N. The following steps listed below fixed my problem with computer not reading my cameras SD card- an update to the card reader driver.

First, I had to locate the device manager.


If you have any computer issues, BestBuy has a service available to assist with scenarios such as this.

Best Wishes,
debra

PS- The first year birthday images will be in the next post!